Overview
STM provides a large range of Cortex-M micro-controllers, grouped in several families. The Eclipse Embedded CDT plug-ins provide support for F0, F1, F2, F3, F4 and F7. Since all templates share common characteristics, the examples shown here will refer only to the F4 family.
Create a new project
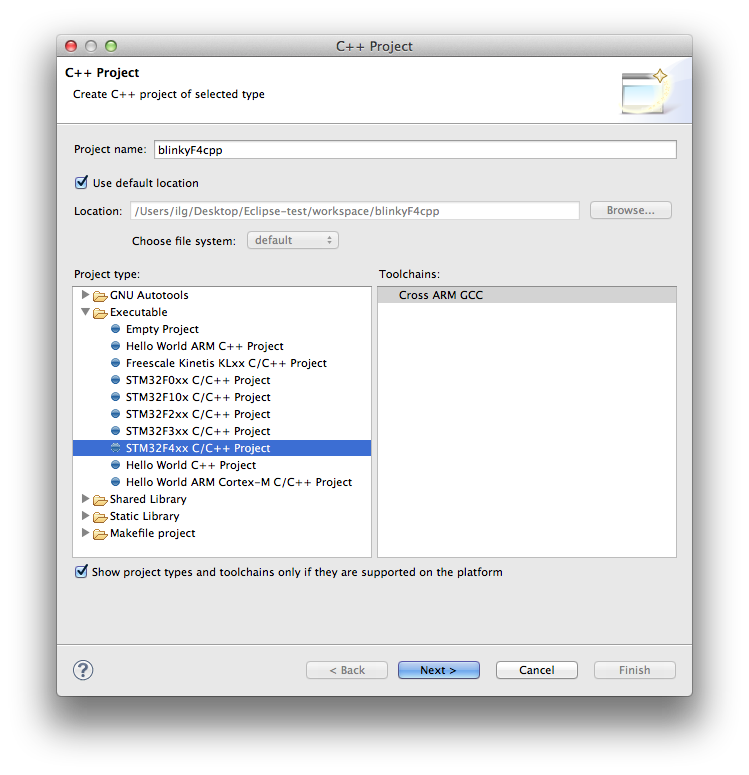
The template can create both C and C++ projects. To create a new C++ project:
- in the Eclipse menu, go to File → New → C++ Project
- in the Executables group, select the STM32F4xx C/C++ Project
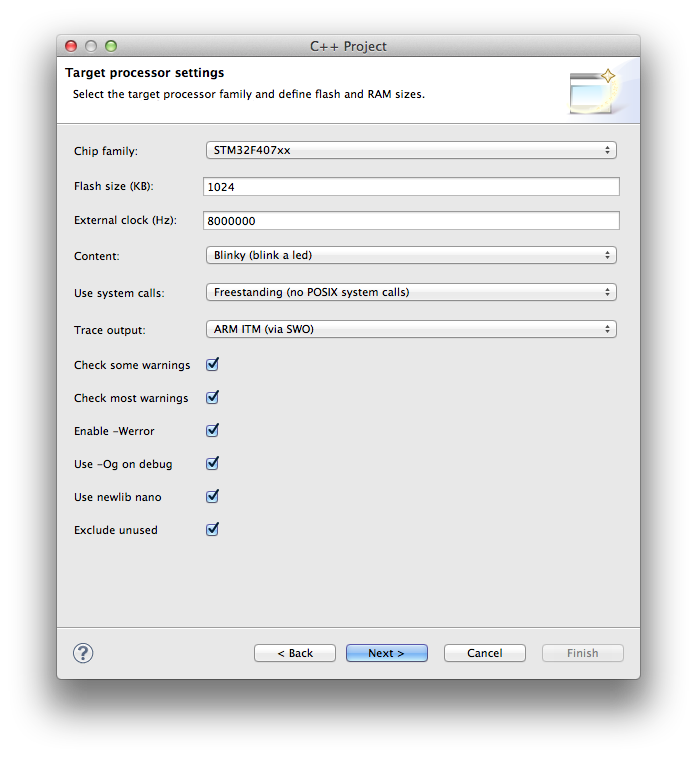
Select the MCU and various project settings:
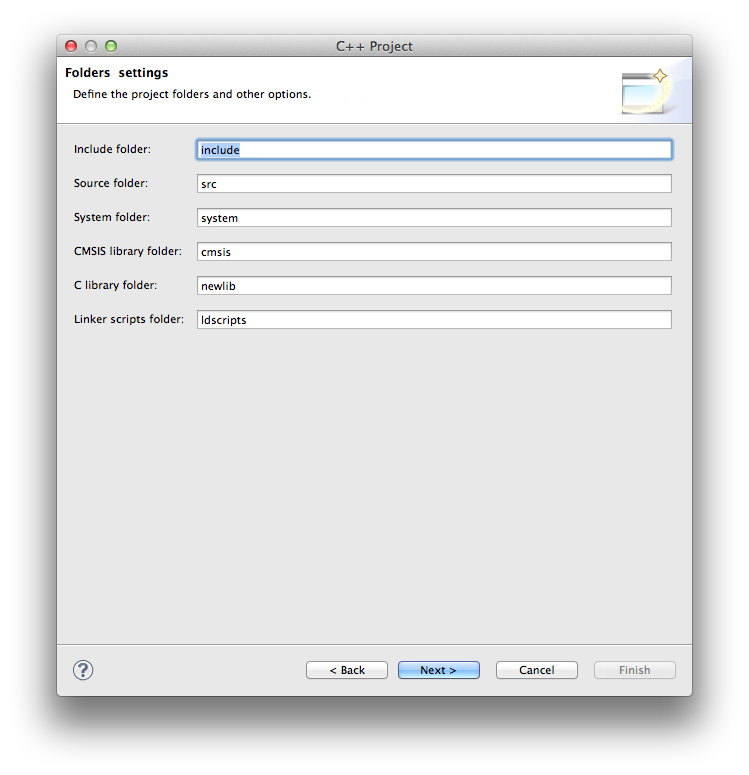
Define the names of the destination folders:
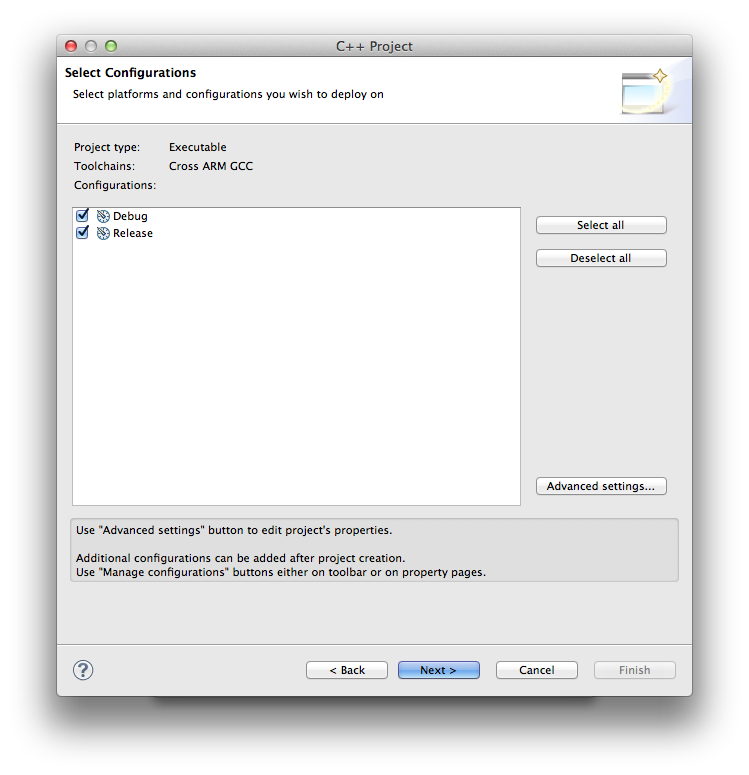
Accept the default configuration names:
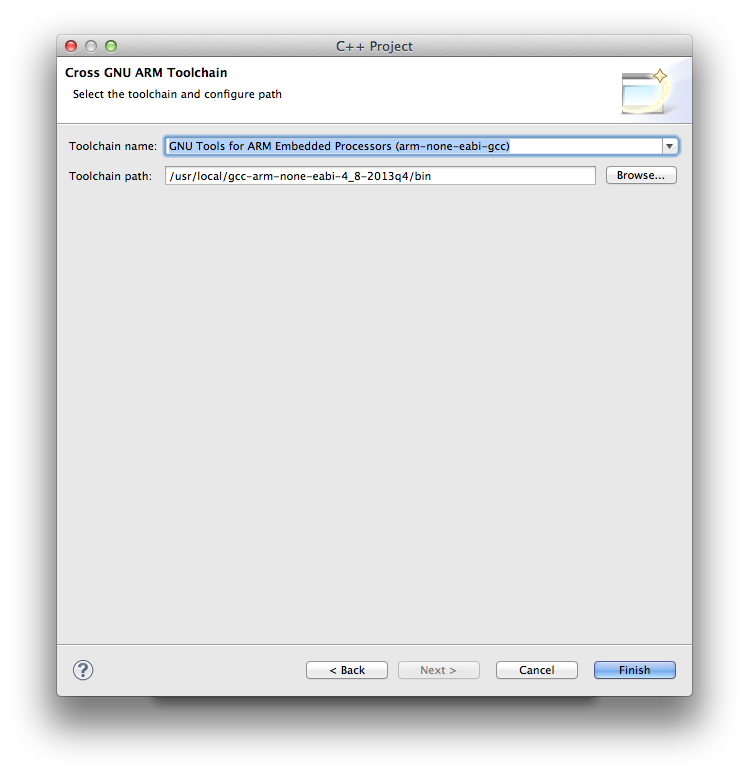
Define the toolchain name and path:
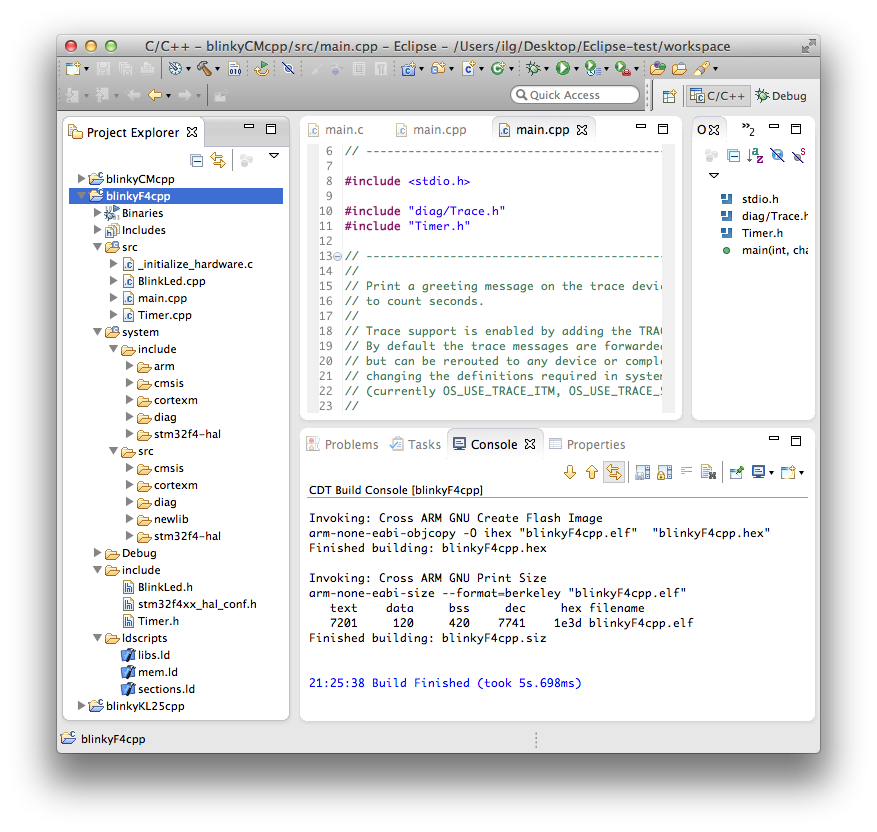
The generated project has the following structure:
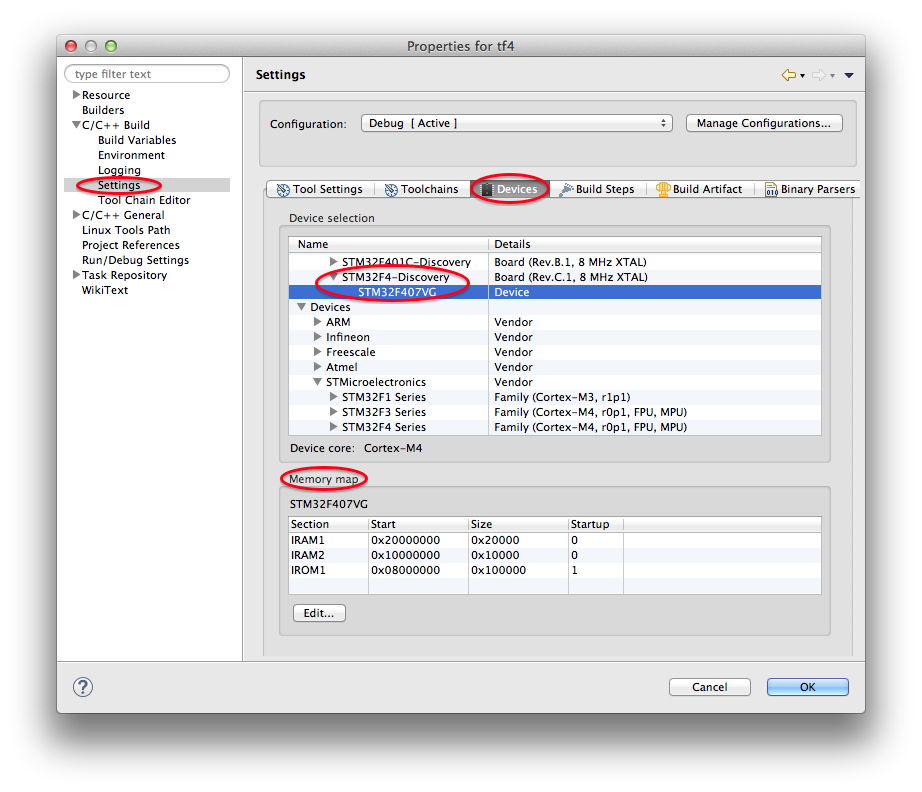
Associate a device to the project
Future releases of the wizard might do this automatically but for now it is recommended to do it manually.
For more details, please visit the separate Associate a device to the project page.
Build
As seen in the above picture, the project builds without errors and runs on the STM32F4DISCOVERY board, blinking the LED and printing trace lines on the debugger output window.
Exclude unused
By default, the template wizard enables the Exclude unused option. The result is that unused device drivers source files, although copied in the project, are excluded from build, mainly to save some build time.
If you need to re-include some of the source files you need to right click on the file, select Resource Configurations → Exclude from Build… and deselect the build configuration you want to include the file.
Load flash and debug
Once you successfully built the project (be sure the text size in the Print Size step is not zero), you need to connect the board to your development machine and download the program into the board flash memory.
For Arm devices, this is done using a JTAG or SWD probe. Most professional development boards include the standard JTAG connector, and a professional JTAG probe, like J-Link, can be used directly.
Some low cost development boards do not include the standard JTAG connector, but have an on-board version of a JTAG probe. For example, the STM32F4DISCOVERY includes a version of ST/LINK V2, and the board can be directly connected via USB to the development machine. The portable method of using the ST/LINK V2 is via OpenOCD.
For more details on debugging, please refer to the specific debug pages.
Troubleshooting
The usual sources for build failures are:
- a wrong or missing toolchain path; go to the project properties, C/C++ Build → Setting → the Toolchains tab and define the correct path;
- missing build tools (make & rm) on Windows; install the build tools.