Overview
The first challenge when encountering a new board is to make it say Hello. This is even simpler than blinking a LED, since it does not require any peripheral drivers, like GPIO or timers.
The preferred way to output Hello message is via the standard output, routed to the semihosting trace channel, which is supported by most debuggers.
Such a project is a good starting point for writing unit tests, which generally are standard applications displaying various messages and returning an exit code.
Prerequisites
Before creating a new project, please be sure you checked all prerequisites described in the Prerequisites page,
xpm
Special consideration should be given to install node/npm/xpm,
which are mandatory for
instantiating xPack templates.
Pre-download binary tools
This is an optional step, but highly recommended. Without it the Eclipse plug-in will install all dependencies anyway, including the toolchains and all other binary tools, but, especially for the RISC-V toolchain which is very large, this will take quite a long time, without any feedback.
Thus it is recommended to manually download the dependencies before attempting to create a new project.
For Cortex-M and Arm 32-bit projects, the following commands can be used:
xpm install --global @xpack-dev-tools/arm-none-eabi-gcc@11.2.1-1.2.2 --verbose
xpm install --global @xpack-dev-tools/qemu-arm@7.0.0-1.1 --verbose

xpm install --global @xpack-dev-tools/cmake@3.21.6-1.1 --verbose
xpm install --global @xpack-dev-tools/ninja-build@1.11.0-1.1 --verbose
For RISC-V projects, replace the first lines with:
xpm install --global @xpack-dev-tools/riscv-none-elf-gcc@12.1.0-2.1 --verbose
xpm install --global @xpack-dev-tools/qemu-riscv@7.0.0-1.1 --verbose
Create a new C++ project
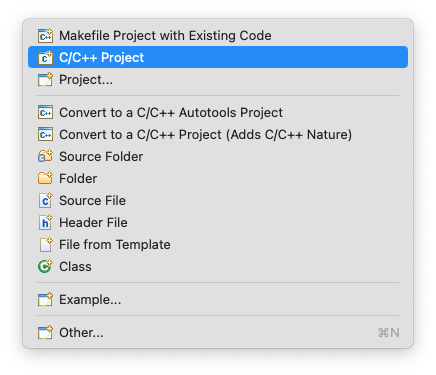
To create a new project, go to Eclipse menu, File → New (or the button in the upper left corner), and select the C++ Project:
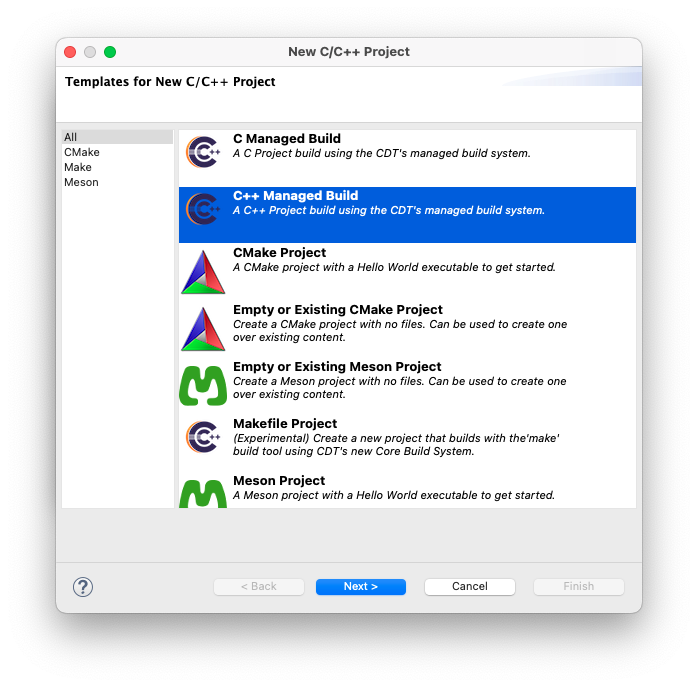
In the New C/C++ Project window, select C/C++ Managed Build and click the Next > button.
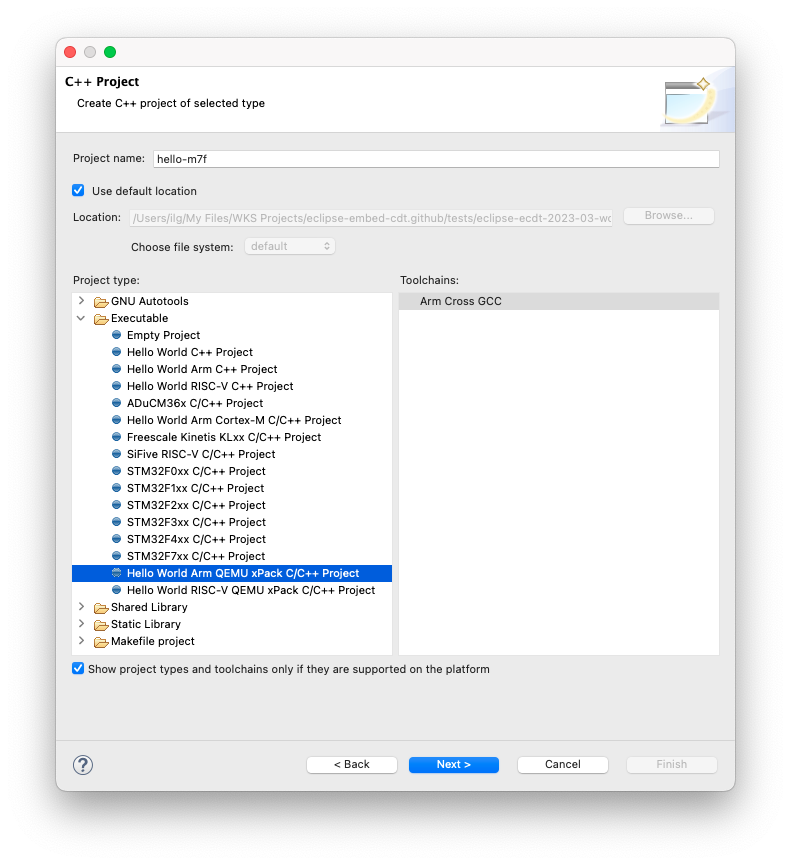
In the C++ Project window:
- in the Project name: field enter the name of the new project, for example hello-m7f
- in the Project type: section expand the Executable type and select Hello World Arm QEMU xPack C/C++ Project
- in the Toolchains: section select Arm Cross GCC
- click the Next > button
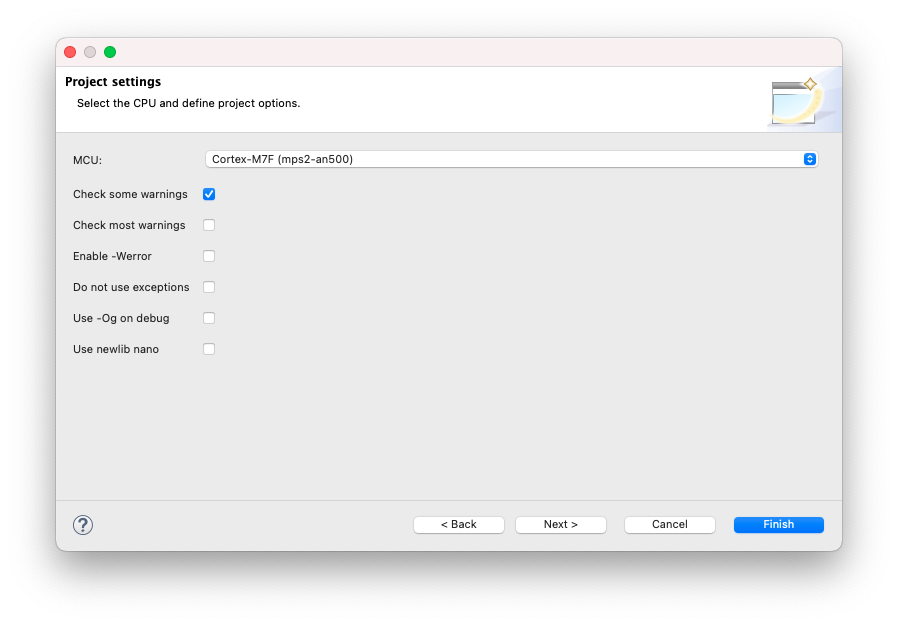
In the Project settings window:
- select the MCU: as Cortex-M7F
- enable Check some warnings
- disable all other
- click the Next > button.
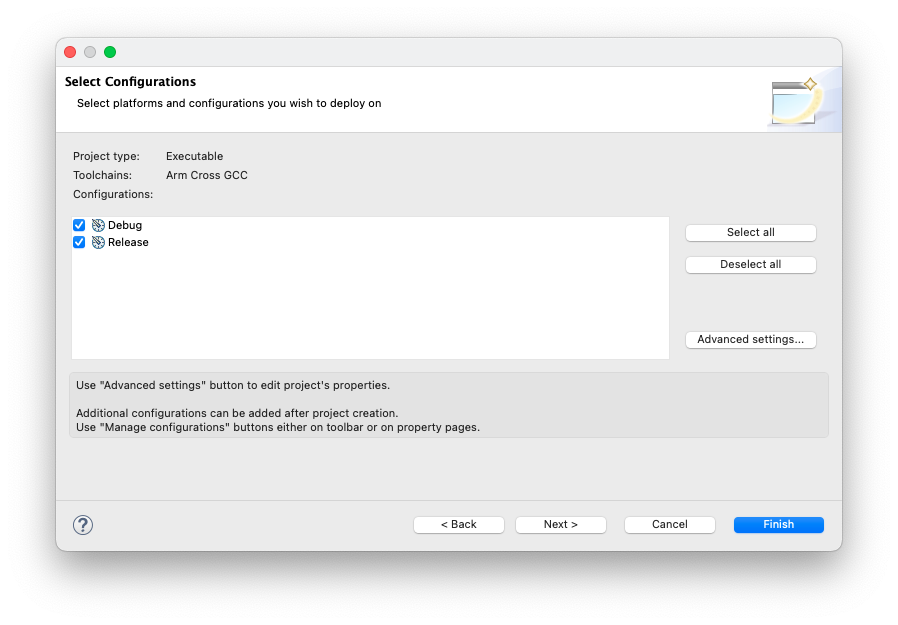
In the Select Configurations page leave the suggested Debug/Release configurations checked and click the Next > button.
In the Cross GNU Arm Toolchain window:
- select the Toolchain name: xPack GNU Arm Embedded GCC (mandatory)
- if the xPack was installed via xpm, click xPack… and select the version; otherwise
browse for the
binfolder within the toolchain folder; don’t be afraid to use the absolute path, it is not stored in the project - click the Finish button
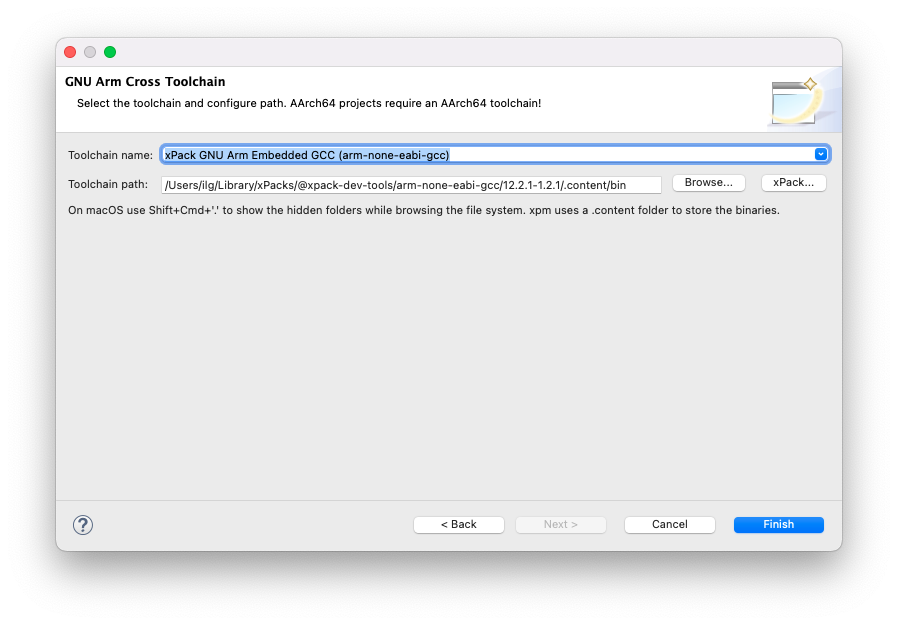
/.content/bin folder
where programs like arm-none-eabi-gcc are located.
With all setting ready, the plug-in runs the external command xpm init --template ... to actually populate the project with files:
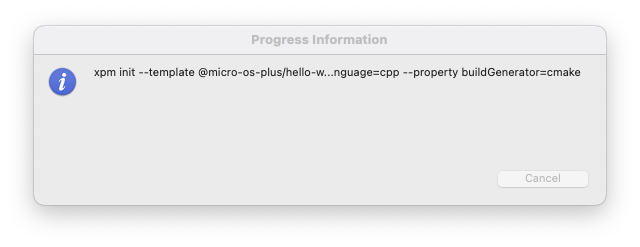
This takes a few moments, and then the plug-in runs xpm install, which
downloads all dependencies.
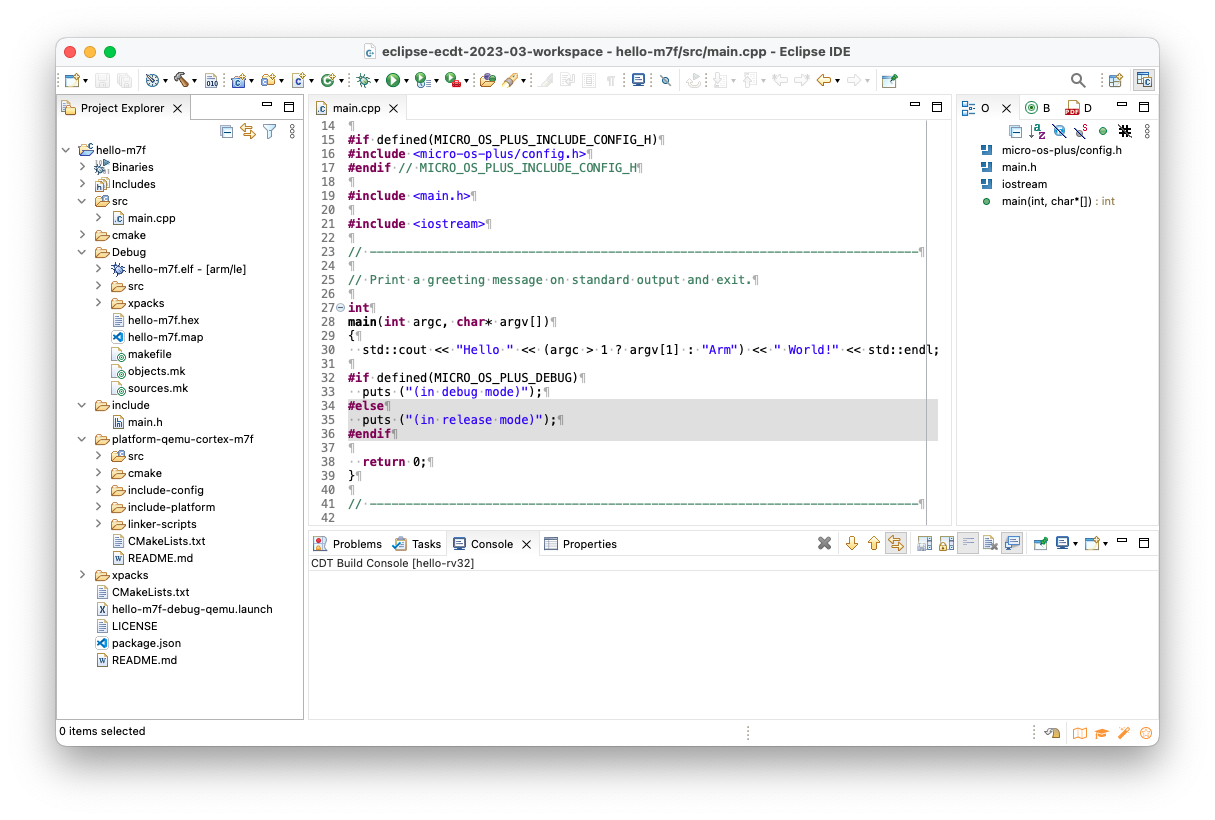
The result of the wizard is a simple project, with a main() function printing a greeting on the standard output.
Build the project
To start the build:
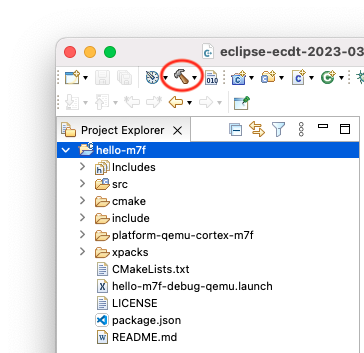
- select the new project in the Project Explorer section
- click the hammer icon
The build process should leave in the Console window a listing like this:
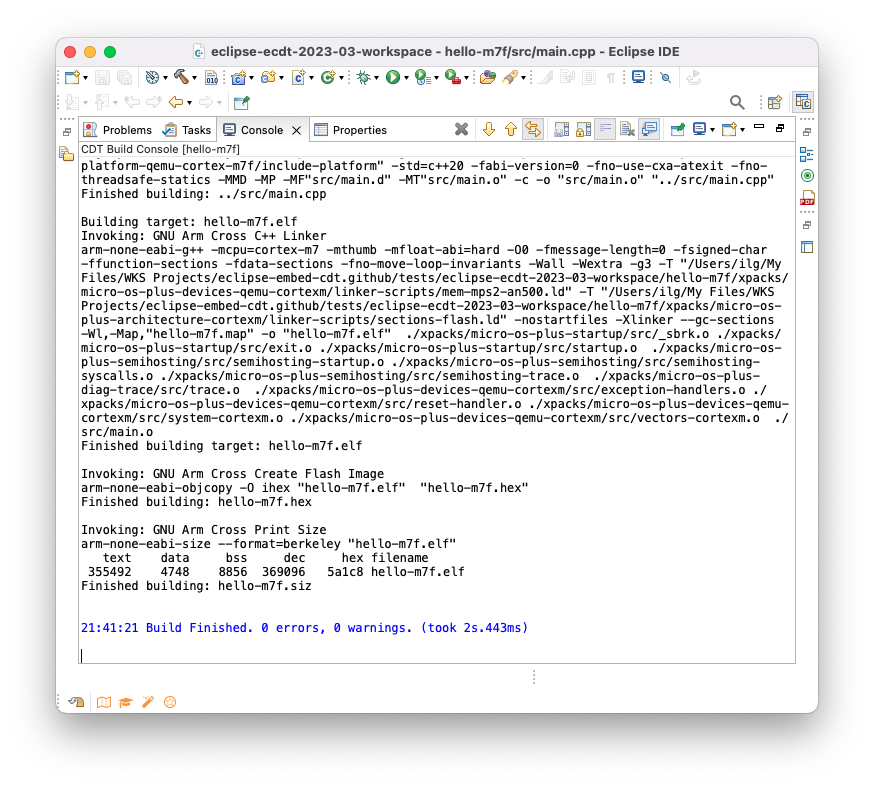
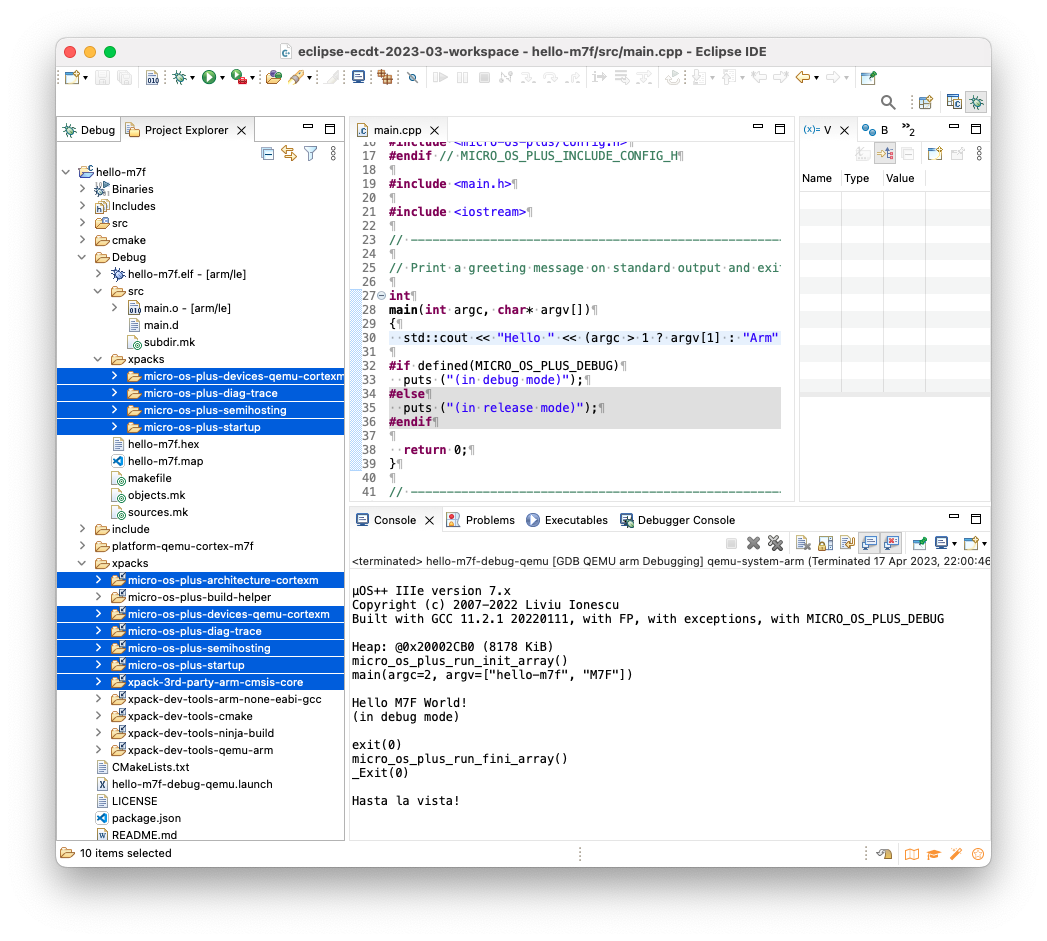
The files created by the build process are left in a folder named by the name of the configuration, for example Debug or Release.
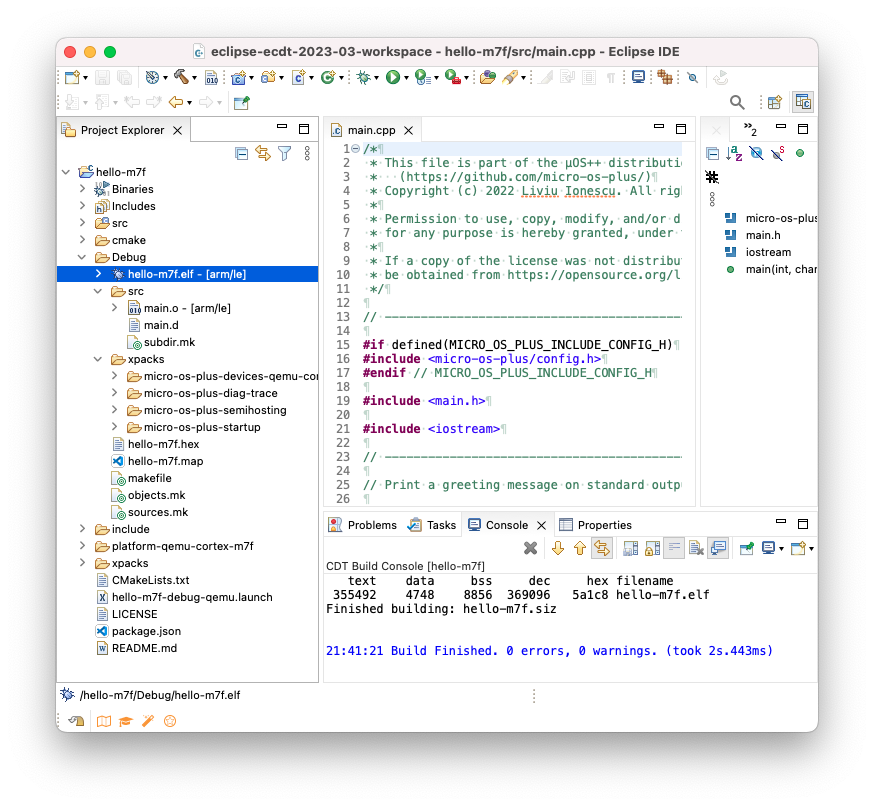
As seen above, the Debug folder is populated with:
- all make files required for the build (makefile and various *.mk files, generated by CDT),
- the object files and dependency files generated during the build (main.o and main.d) and
- the final executable file, with all debug symbols, useful for a debug session (hello-m7f.elf)
- the binary executable file, ready to be programmed in flash (hello-m7f.hex)
- a program map, with all symbols and their associated addresses (hello-m7f.map)
Run/Debug the test using QEMU Arm
The most convenient way to run a debug session with this test is to use the QEMU Debugging plug-in; no physical hardware is required.
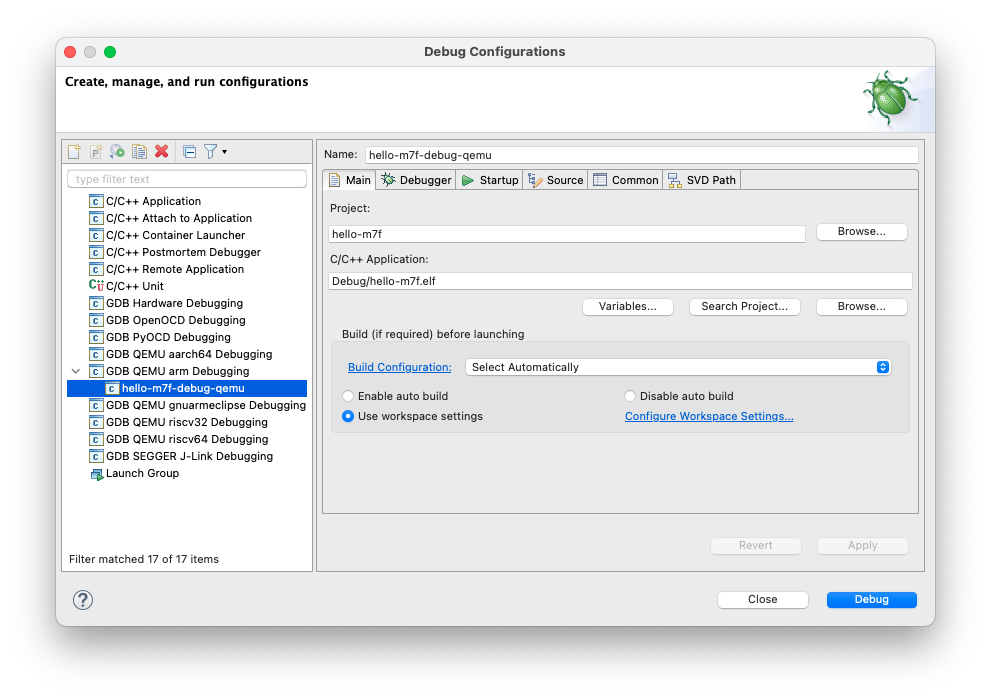
Eclipse menu → Run → Debug Configurations…
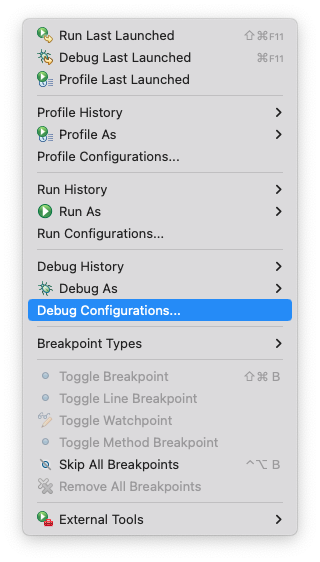
- expand the GDB QEMU arm Debugging category
- select the hello-m7f-debug-qemu configuration
- click the Debug button
Confirm the switch to the debugger perspective, and allow the plug-in to remember this setting.
The Eclipse debugger is started, with a breakpoint in main().
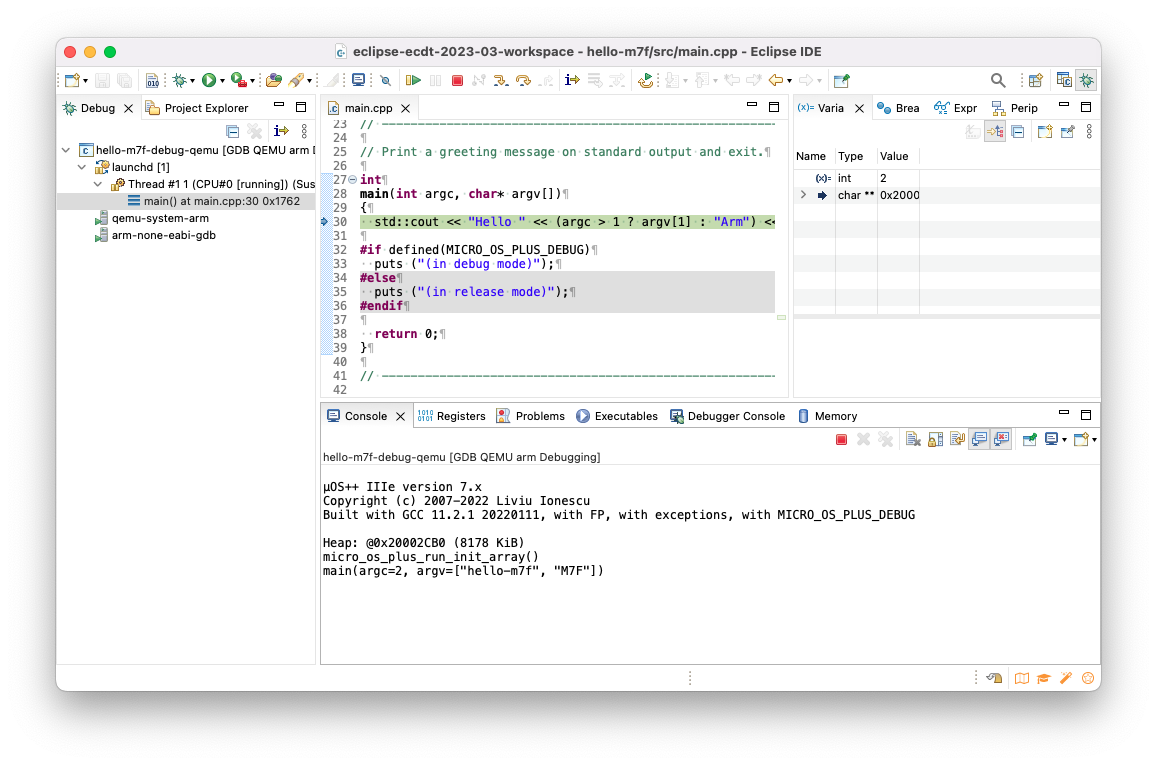
From here you can either step over several instructions, or click Resume (the green right pointing triangle).
QEMU will run the program and display some information, including several trace lines, in the console:
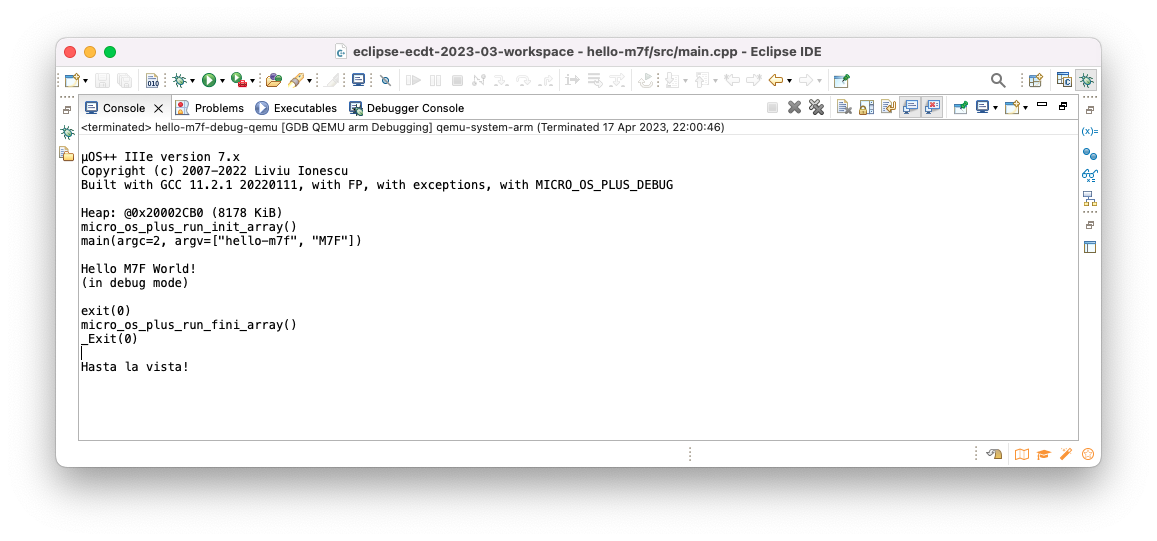
Full semihosting
Contrary to usual POSIX environments, like GNU/Linux, embedded systems
usually do not provide standard input/output devices. In the code generated
by the template, the output of the printf() calls, including
trace_printf(),
is redirected to a special debugging channel implemented by most debuggers,
using the semihosting protocol.
Even more, the Arm semihosting specs also define read/write file operations, which can be used during tests to read input stimulus data and to output test results.
Project structure
The resulting project has a quite regular structure, with separate folders for the portable content, for the platform specific content, and for the dependencies.
The portable content
The portable content is located in the top src and include folders.
In this project, there is only a main.cpp file with its header:
% tree src include
src
└── main.cpp
include
└── main.h

0 directories, 2 files
The platform specific code
As configured when the template was instantiated, the project is expected to run on a Cortex-M7F, emulated by QEMU.
The project specific code for Cortex-M7F is in the platform-qemu-cortex-m7f folder:
% tree platform-qemu-cortex-m7f
platform-qemu-cortex-m7f
├── CMakeLists.txt
├── README.md
├── cmake
│   ├── dependencies.cmake
│   └── globals.cmake
├── include-config
│   └── micro-os-plus
│       └── config.h
├── include-platform
│   └── micro-os-plus
│       ├── platform-qemu-cortex-m7f
│       │   └── defines.h
│       └── platform.h
├── linker-scripts
└── src

8 directories, 7 files
Most of the files are placeholders, the only file with some content is
include-config/micro-os-plus/config.h, which defines some startup
and semihosting variables.
The actual code is in the dependent libraries installed in the xpacks
folder.
The dependencies folders
As per the xPack design, the source libraries are downloaded and linked in
the xpacks folder:
Each library has the usual structure, with a src folder for the C/C++ source
files, an include folder with the headers, and some metadata for assisting
the build.
For example, the @micro-os-plus/semihosting package has the
following content:
% tree xpacks/micro-os-plus-semihosting
xpacks/micro-os-plus-semihosting
├── CHANGELOG.md
├── CMakeLists.txt
├── LICENSE
├── README.md
├── include
│   └── micro-os-plus
│       ├── semihosting-inlines.h
│       └── semihosting.h
├── meson.build
├── package.json
├── src
│   ├── semihosting-startup.cpp
│   ├── semihosting-syscalls.cpp
│   └── semihosting-trace.cpp
└── xpack.json

3 directories, 12 files
The dependent libraries are actually not located in the project, but in
a central store, and the sub-folders below xpacks are symbolic links
(junctions for Windows).
The xPack dependencies should not be saved in the project repository,
since the xpacks folder can be easily recreated in a freshly cloned
project with xpm install.
The content of the central store is read-only, such that the source files (which can be used by multiple projects) cannot be inadvertently changed.
For development purposes, it is possible to replace the links to the
central store with links to a local repository, where the files can be
edited, using a pair of the xpm link commands (see the
xpm link page).
Headless builds
The template is a separate project that can be fully used in a terminal:
To run the builds, a series of actions are pre-configured, for example
to build the Debug configuration for Cortex-M7, a prepare should
be performed only once, and later the build step can be performed:
xpm run prepare --config qemu-cortex-m7f-cmake-debug
xpm run build --config qemu-cortex-m7f-cmake-debug
Support
If you encounter any problems when using this template, please refer to the Support page and do not send private emails.