Eclipse has some unusual defaults, and this is one of the reasons sometimes Eclipse fails to meet beginner expectations. Fortunately this can be easily fixed, each time after creating a new workspace it is recommended to check and maybe change the settings below.
Locate the Preferences menu
Eclipse has lots of settings, and they are a bit confusing for beginners. Apart from various objects Properties, accessible with Right click in most situations, there are settings that apply to the entire workspace, and these settings are named Preferences, accessible in the top menu.
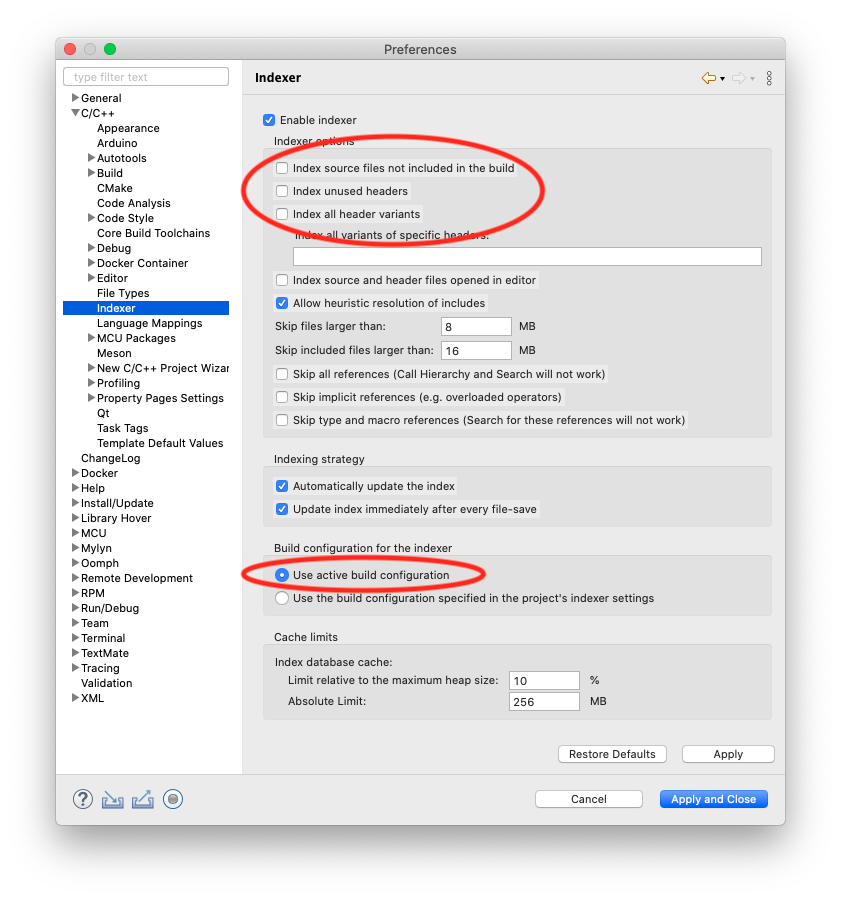
Use active build configuration for indexing
Eclipse CDT has a very powerful indexer, which parses the source code on the fly and provides hints, auto-completion help, error reporting, etc. while editing, without having to start the build process. For this indexer to be accurate, it must be in sync with the compiler, in terms of options and environment. For the indexer to automatically sync when changing from one configuration to another, check if the indexer was set to use the active configuration:
- go to the Eclipse menu → (Window →) Preferences → C/C++ → Indexer
- disable Index source files not included in the build
- disable Index unused headers
- enable Use active build configuration
- click the Apply button
Editor folding
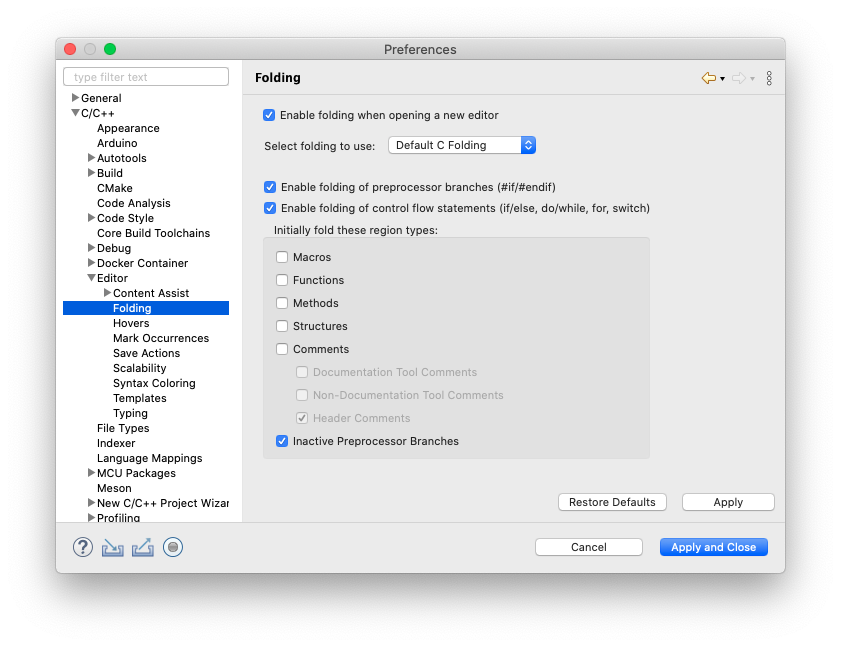
To better view the entire content of the source files, it is recommended to disable editor folding:
- go to the Eclipse menu → (Window →) Preferences → C/++ → Editor → Folding
- enable Enable folding of preprocessor branches
- enable Enable folding of control flow statements
- enable Inactive Preprocessor Branches
- disable all entries in the Initially fold these region types, especially the Header Comments
- click the Apply button
Code formatter
Eclipse CDT has a very useful feature allowing to automatically reformat a piece of code to comply to a given style. The recommended style is GNU, but you are free to choose or even design your own style.
To set it:
- go to the Eclipse menu → (Window →) Preferences → C/C++ → Code Style → Formatter
- in the Active profile: field, select GNU [built-in]
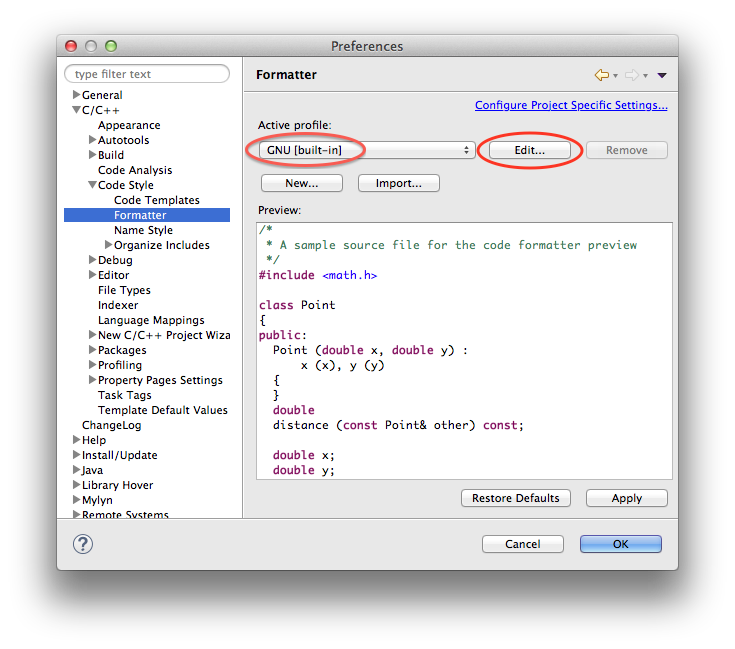
Except very special company policies, it is generally recommended to NOT change the individual formatter style, and to apply the GNU format to all source files in a project before committing to the repository.
However, there is one detail that need to be changed, and this is the tab processing policy.
For this, click the Edit… button.
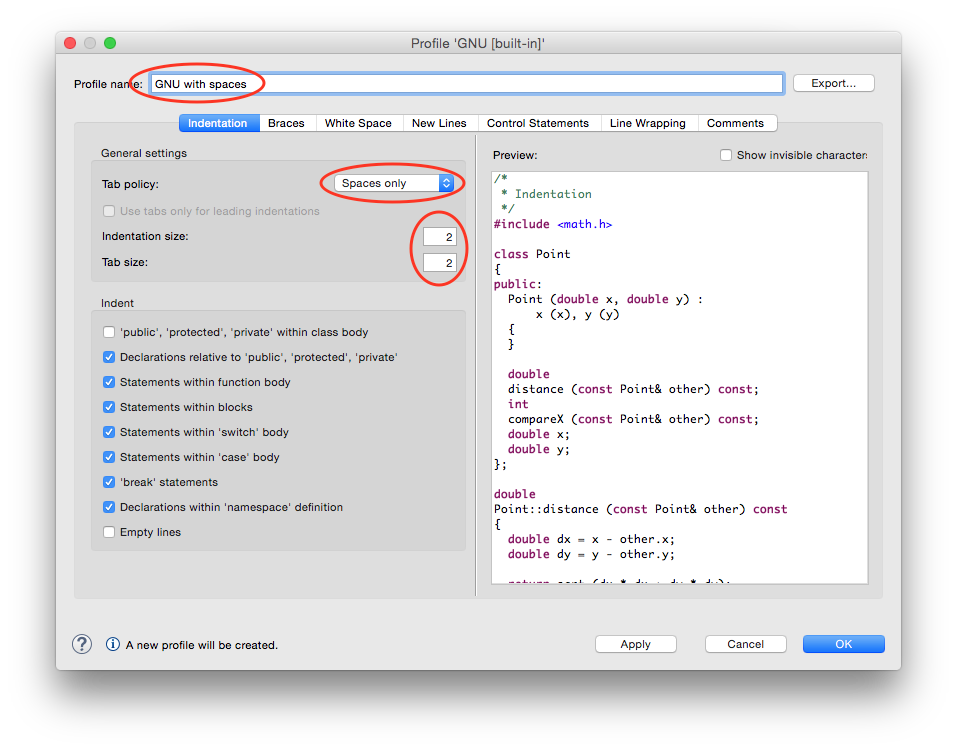
Change the tab policy to Spaces only, and the indentation and tab size to 2.
Since these changes were applied to a built in style, it is not possible to save the settings directly, but it is very easy to create a new profile name (for example GNU with spaces), and possibly export it for archiving.
When done, click the OK button twice.
To reformat a file:
- select the file in the
- go to the Eclipse menu → Source → Format
The same action can be triggered with a right click and a Source → Format or even easier, with a keyboard shortcut (cmd+shift+F on macOS).
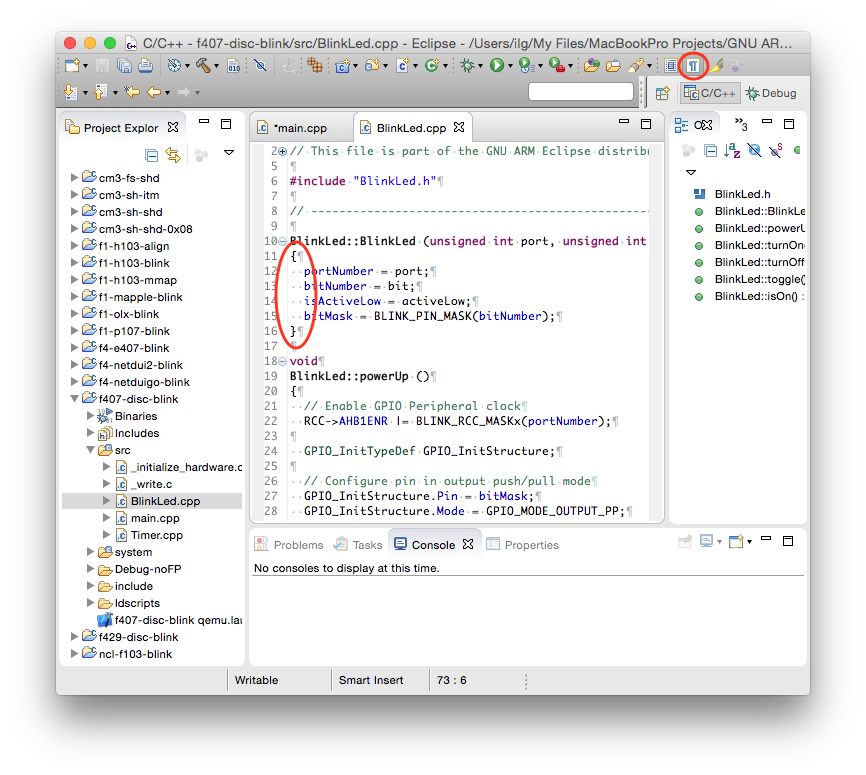
To check if the text indeed has spaces and not tabs, enable the Show Whitespace Characters:
Show source roots
For large projects, with many source folders, you might want to disable showing the source folders:
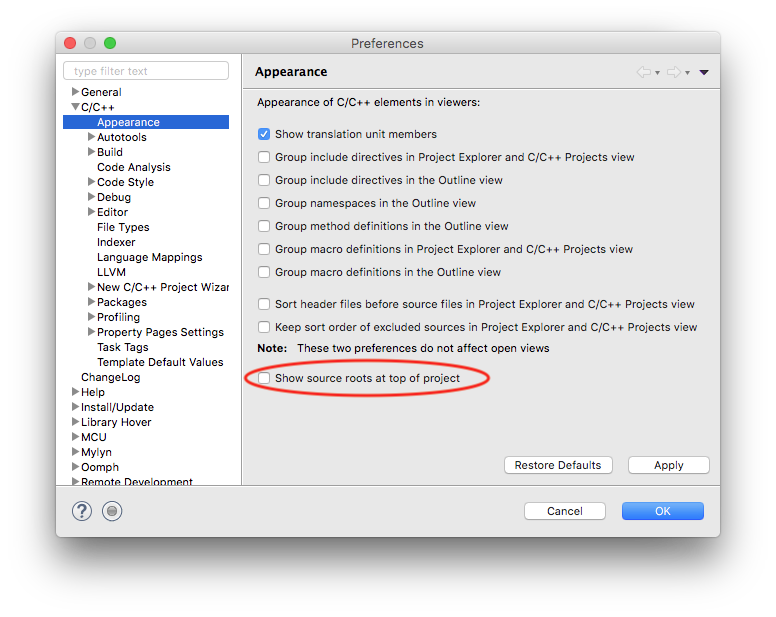
- go to the Eclipse menu → (Window →) Preferences → C/C++ → Appearance
- disable Show source roots at top of project.
Save automatically
Sometimes users are very confused to see that after the edit/compile/run cycle nothing changed in the program behaviour, although the editor clearly shows the changes. Usually the main reason is that the file was not actually saved and the build process used the previous version of the file. To automatically save edited files before build,
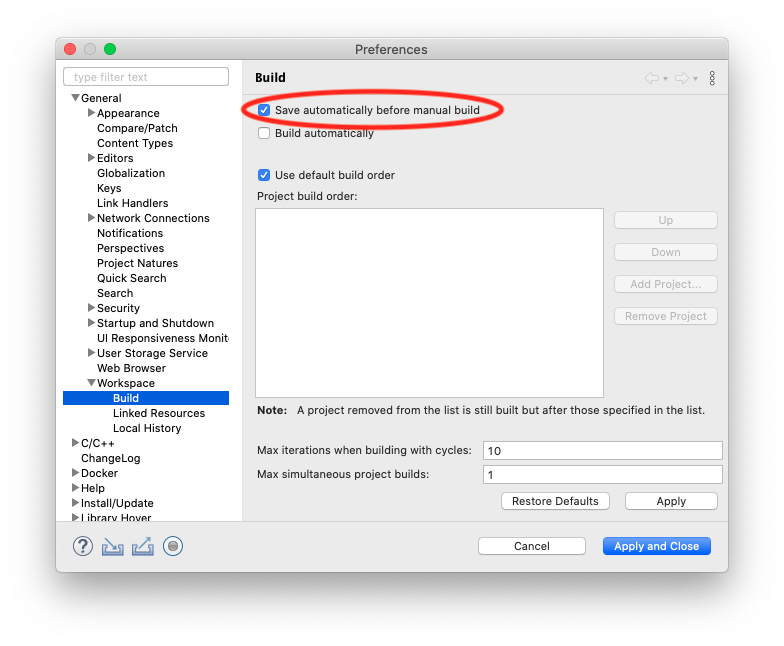
- go to the Eclipse menu → (Windows →) Preferences → General → Workspace → Build
- enable Save automatically before manual build
It is also recommended to:
- disable the Build automatically option
When you’re done:
- click the Apply button
Text file encoding
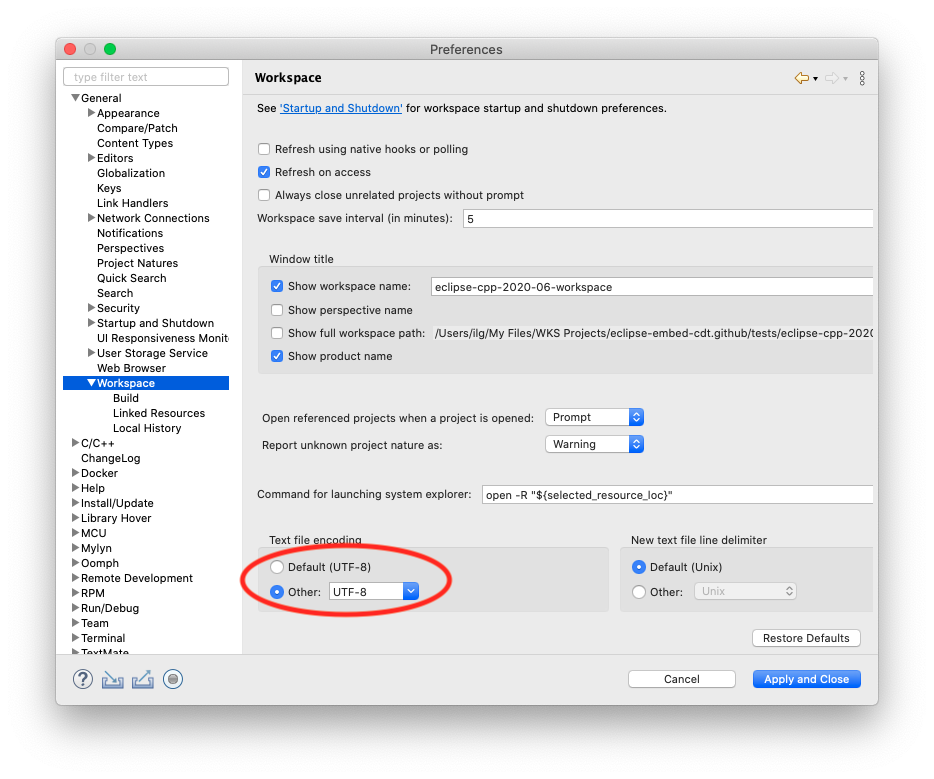
In the parent page, select the default text file encoding to UTF-8. Without this setting, special characters like diacritics, are generally replaced with question marks (for example the µOS++ name used in the template generated source files is shown as ??OS++ or even ��OS++).
- in the Text file encoding section
- if the default is not already UTF-8, click the Other button
- select UTF-8 in the combo box
It is also recommended to:
- check the New text file line delimiter to be set to Unix
When you’re done:
- click the Apply button
Show line numbers
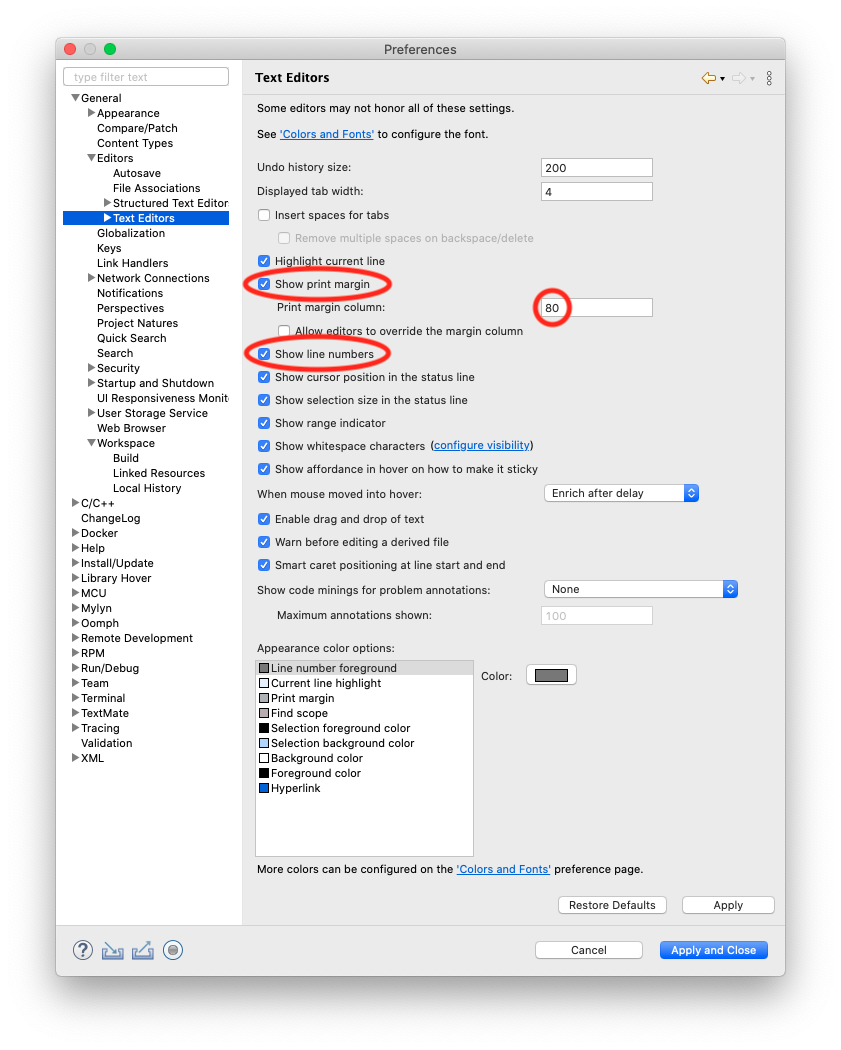
Although not critical, while editing source files, it is useful to see the line numbers, and also a hint that the line may be too long:
- go to the Eclipse menu → (Window →) Preferences → General → Editors → Text Editors
- enable Show line numbers
- enable Show print margin
- set the Print margin column at 80
- click the Apply button
Build console
The build console is the place where the progress of the build process is presented, and where the compile/link errors are shown.
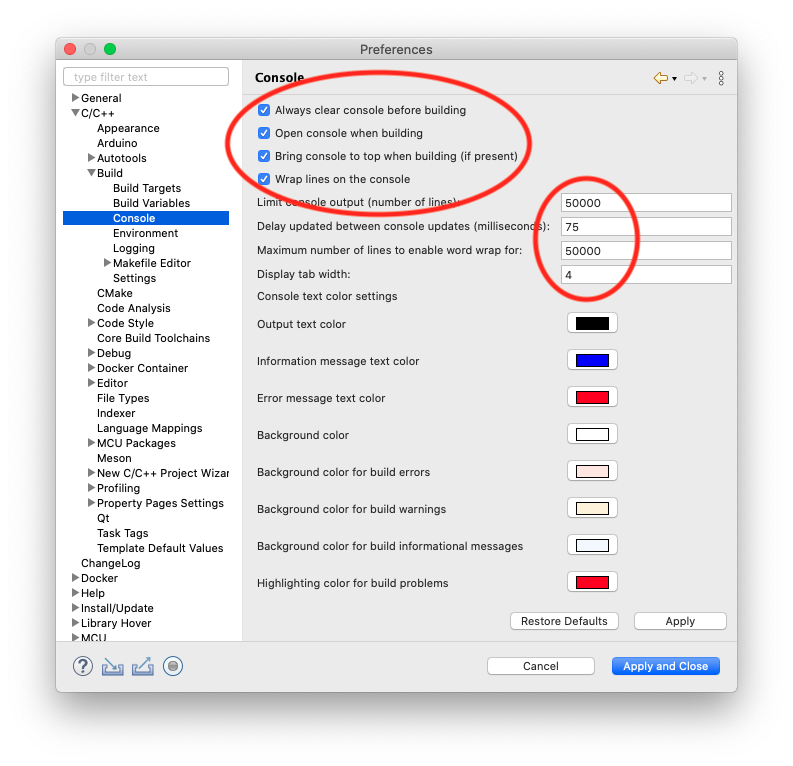
The CDT defaults need some tweaks, to increase the number of lines and to make the lines wrap:
- go to the Eclipse menu → (Window →) Preferences → C/C++ → Build → Console
- enable Bring console to top when building
- enable Wrap lines on the console
- increase the Maximum number of lines to enable word wrap: field, for example from to 50000 lines
- increase the Limit console output: field, for example to 50000 lines
- click the Apply button
When all settings are done, click the OK button.
Doxygen
To enable support for documentation tool comments:
- go to the Eclipse menu → (Window →) Preferences → C/C++ → Editor
- select Doxygen in the Documentation tool comments
This will allow, for example, auto-completion for Doxygen comments, you can
type only /** and the rest of the comment is automatically inserted.
/** comments and @ commands.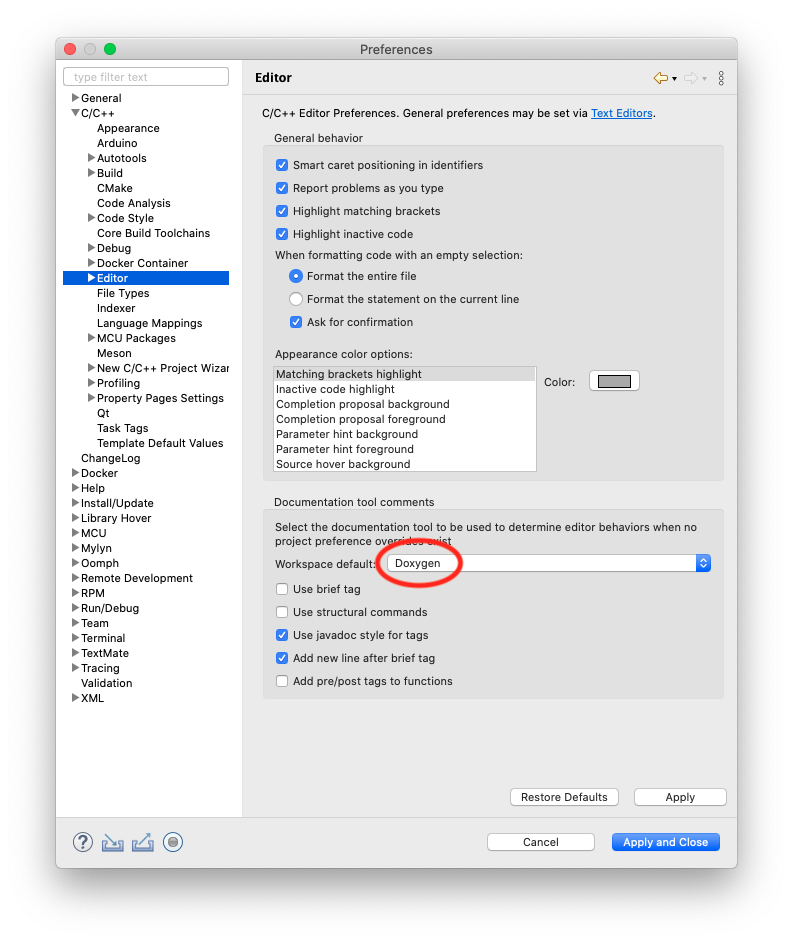
Debug previous application
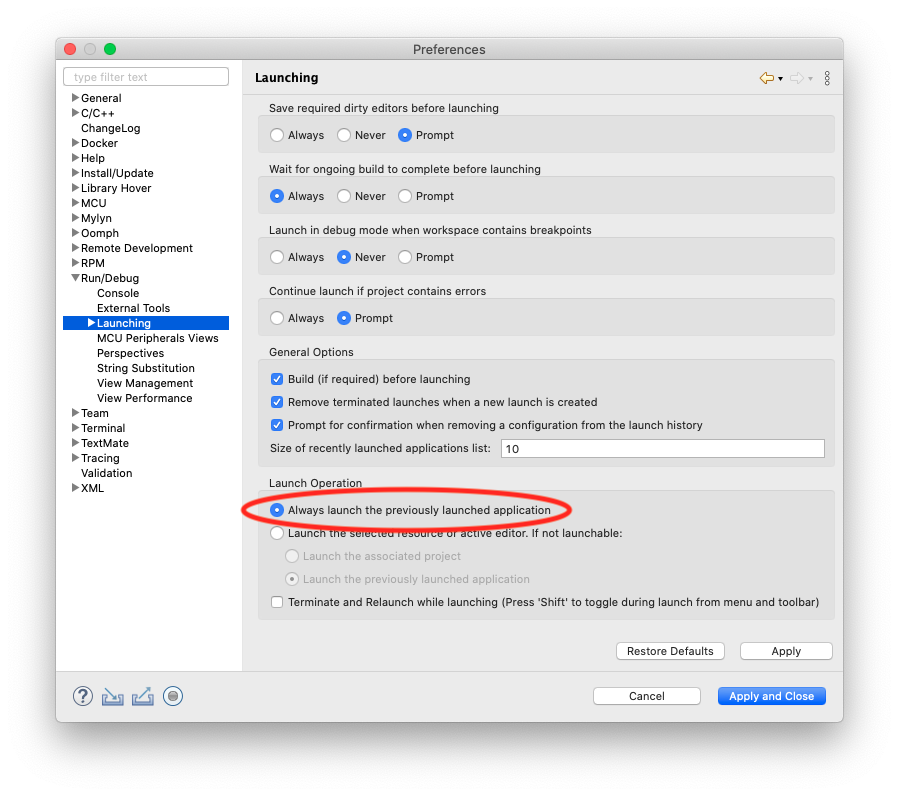
Another Eclipse default that needs to be changed is the way programs are debugged. Eclipse remembers the previous debug configuration used and can present it as the default for the main debug button.
To change this setting:
- go to the Eclipse menu → (Window →) Preferences → Run/Debug → Launching
- select Always launch the previously launched application in the Launch Operation section.
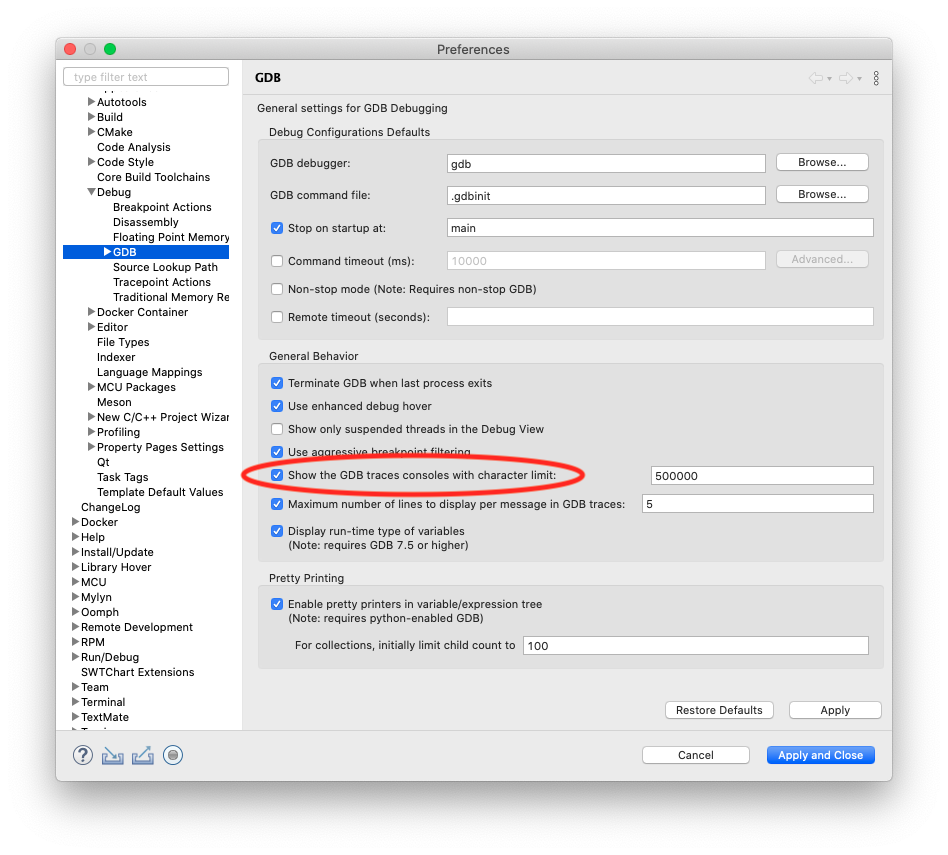
Enable GDB trace console
While debugging, it is sometimes useful to see the dialogue between Eclipse and GDB. For this, it is necessary to enable the GDB Trace console.
To change this setting:
- go to the Eclipse menu → (Window →) Preferences → C/C++ → Debug → GDB
- select Show the GDB traces console in the General Behaviour section.
